How to Make a Disaster Prepper Kit: Survival Tips for Building an Emergency Supplies Kit
Why Should You Have a Disaster Prepper Kit?
1. A disaster prepper kit can help you survive in an emergency situation.
A disaster prepper kit is a collection of emergency supplies that can help you survive in an emergency situation. The kit should include items such as food, water, clothing, and a first-aid kit. It is important to assemble your kit well in advance of an emergency. Try to include a pair of comfortable shoes in your disaster supply kit. A disaster prepper kit should include food, water, and other supplies to last for 72 hours. Basic services may not be available for days or even weeks after a disaster. You need to be self-sufficient in order to survive after a disaster. A disaster prepper kit should include items to help you manage during an emergency or evacuation. Methods for building a kit vary depending on the type of emergency or evacuation being prepared for. Packing supplies for an emergency or evacuation should include food, water, shelter, and medical supplies. A disaster prepper kit should include items that are essential for staying safe during an emergency. Make sure to pack the kit specifically for the emergency that you’re most likely to face
2. A disaster prepper kit can help you stay safe during a natural disaster.
A disaster prepper kit should include items that will help you survive an emergency situation. These items can include food, water, shelter, and medical supplies. The kit should be tailored to the specific emergency that’s most likely to happen.
3. A disaster prepper kit can help you stay healthy during a pandemic.
A disaster prepper kit is a collection of supplies and equipment that can help you survive during an emergency, like a pandemic. The kit should be packed with essentials, and be appropriate to the situation that’s most likely to happen. By acting methodically and thoroughly, you can make a survival kit that will increase your odds of staying safe during an emergency.
4. A disaster prepper kit can help you stay comfortable during an evacuation.
A disaster prepper kit should include items to help you stay comfortable during an evacuation. This may include items such as comfortable shoes, food, water, and shelter. It is important to have a kit ready in case of an emergency with no advance notice.
5. A disaster prepper kit can help you stay organized during an emergency.
A disaster prepper kit helps with organization during an emergency by providing basic necessities that are needed in case of an evacuation. The kit should be tailored to the situation that is most likely to happen and should include items such as food, water, and shelter. Making a kit helps you stay organized and prepared for any emergency.
6. A disaster prepper kit can help you stay calm during a crisis.
A disaster prepper kit can help you stay calm during a crisis by providing you with the essentials for safety and survival. Your kit should include enough food, water, and supplies to last for 72 hours, as well as comfortable shoes to help you manage during an emergency. Basic services such as electricity, gas, and water may not be available for days or even weeks after a disaster, so it is important to be self-sufficient in order to survive.
7. A disaster prepper kit can help you stay connected during an emergency.
A disaster prepper kit can help you stay connected during an emergency by providing items such as a phone charger, a flashlight, and first-aid supplies. The kit is useful for both short-term emergencies and long-term planning.
8. A disaster prepper kit can help you stay protected during a disaster.
A disaster prepper kit is a must-have for anyone who wants to be prepared for a disaster. The kit should include items such as food, water, a first-aid kit, and shoes. It is important to have a plan in place in case of an emergency. A disaster prepper kit should include items to help you manage during outages. You can build a kit for your house, or make a kit for when you’re hiking or camping in the wilderness. Packing supplies for an emergency or evacuation is also a good idea. make sure your disaster prepper kit includes items like food, water, first-aid supplies, and flashlights. Make sure the items in your kit are reliable and effective.
9. A disaster prepper kit can help you stay prepared for anything.
A disaster prepper kit is a collection of supplies that can help you survive in the event of an emergency. Basic services may not be available for days or weeks after a disaster, so it’s important to have a kit that contains food, water and other essentials. Packing supplies for an emergency can be done in advance, and depending on the situation, you may need to evacuate your home. Having a disaster prepper kit can help you increase your odds of safety during an emergency.
10. A disaster prepper kit is a good investment.
A disaster prepper kit is a good investment because it provides you with the supplies you need to survive in an emergency situation. A well-stocked disaster kit should last for at least 72 hours and include items such as food, water, and medical supplies. If you live in a challenging environment or have kids, a disaster prepper kit is a good investment for your family’s safety.
What Supplies Should You Include in a Disaster Prepper Kit?
1. Water
Water is an essential disaster prep item because it can be used for many purposes. People need water to drink, to stay hydrated, and to maintain good hygiene. Water can also be used for cooking and food preparation. In hot weather, people may need twice as much water to stay healthy and safe.
Pets also need water to stay healthy. Pets should have 30 mL of water per kg of body weight per day. This amount may increase in hot weather or with strenuous activity.
Water is a critical resource in any disaster situation. It is important to stock up on water in advance of a disaster so that people have enough to drink, cook with, and clean with during an emergency situation.
2. Food
A disaster prepper kit should include food that will last for a while, such as canned goods, an electric food dehydrator, and protein bars. Make sure to rotate your food items so they don’t go bad.
3. Communication and light
The Black Diamond Spot 350 headlamp is a great option for communication and light in a disaster prepper kit because it is bright, lightweight, and has a variety of features. The headlamp comes with a Brightness Memory mode which remembers the brightness setting from last time it was used, making it easier to use in a disaster situation. The headlamp also has a red-light option, strobe option, PowerTap technology, and weighs 3 ounces. The Firesteel Classic from Survival Frog is also an essential for communication and light in a disaster prepper kit because it is a reliable fire-starter tool.
4. First aid
A disaster prepper kit should include supplies for food and water, shelter, and first aid. A basic first aid kit should include:
- adhesive bandages
- butterfly closures
- gauze pads and gauze rolls
- scissors
- foil blankets
- examination gloves
- flashlight/glow sticks
- instant cold pack
- hot pack (body warmer)
- aspirin or acetaminophen
- allergy medication
- tweezers
- burn cream
- alcohol pads
- antiseptic towelettes
- fingersplints
- tongue depressors
- cotton swabs
- eye wash
The list of family member’s medical history medications doctors etc should be readily available. Naloxone (or Narcan) should also be included in the kit in case of opioid overdoses. The disaster prepper kit should be tailored to support the number of people expected in an emergency.
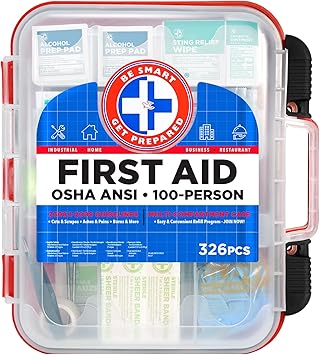
This first aid kit contains 326 pieces of high-quality medical supplies and is manufactured by the leading manufacturer of first aid kits in the USA.
The Tiny FIRST AID Guide is a life-saving emergency tool that can be kept on you at all times and used as a quick reference in unexpected emergency or disaster situations.
The PURELL Advanced Hand Sanitizer Refreshing Gel eliminates 99.99% of germs and has a refreshing scent, making it a convenient option for sanitizing hands when soap and water are not available.
5. Shelter and clothing
A disaster prepper kit should include a hand-crank radio to receive emergency notifications, as well as a hand-crank to ensure you have power even if you run out of batteries. You should also include cell phones and extra cell phone chargers in your disaster prepper kit. Radios can be purchased for anywhere from $25 to $50. Bring extra batteries and a solar-powered or hand crank charger to help keep your devices charged during an emergency.
To minimize use of your cell phone when you don’t have access to power sources, only use it for important communication. Keep a road map in case of an emergency. You can purchase a traditional paper road map from a gas station or print one online. In addition, include items such as soap, toothbrush, and toiletries in your disaster prepper kit, making sure to include storage for personal hygiene products. Also, pack extra sets of clothes in case you are unable to access your wardrobe for a long time. Finally, make sure you have a detailed list of what food, water, shelter, and clothing items to include in your kit.

This emergency weather radio is a must-have for any emergency situation. It not only receives the latest emergency weather forecasts from NOAA and AM/FM stations, but also has a 2000mAh battery that can provide emergency power to small tablets or phones. The bright LED flashlight and reading lamp can light up your surroundings, and the SOS alarm, external antenna, comfortable hand crank, and tap switch meet all your emergency needs.
The 2000mAh power bank ensures you never lose contact with the outside world. With four ways to power, including USB cable, hand crank, solar panel, and AAA batteries, you’ll never run out of electricity.
This emergency radio also has two light sources, a 4 LED reading lamp and 1W LED flashlight, to provide timely help in the dark. The SOS function can also sound a loud siren and flashing light to draw attention and get help quickly.
This product has an 18-month warranty and 24/7 customer service. If you’re not satisfied, they’ll provide a solution immediately. Don’t hesitate to purchase this reliable and essential emergency weather radio.
6. Comfort and cleanliness
A disaster prepper kit should include water, food, communication and light, first aid supplies, shelter, and clothing. Toiletries and personal hygiene items are also essential. Sunscreen, over-the-counter medications, hand sanitizer, garbage bags, extra eyeglasses/contacts/insulin and cold packs are also recommended.
7. Everything else
A disaster prepper kit should be tailored to your specific needs, but generally should include water, food, first aid supplies, communication equipment, and clothing.
Some other important items to consider adding to your kit are a 7-day supply of prescription medications, cash, games or books for kids, personal hygiene items, and a fire extinguisher.
How Do You Build a Disaster Prepper Kit?
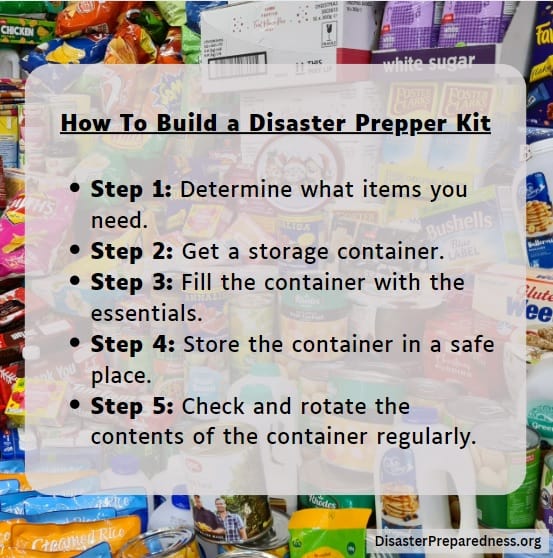 Step 1: Determine what you need
When building a disaster prepper kit, you should take into account your current living situation and needs. Build a kit that is tailored to your specific needs. Make sure you have enough food, water, and emergency supplies to last for at least three months. The process of assembling a survival kit is a personal decision that takes into account your environment, lifestyle and needs.
A pre-made disaster kit is better than nothing, but it’s not ideal and often contains low-quality items. It’s best to assemble your own disaster kit from materials that you collect locally. It’s also a good idea to supplement a pre-made kit with higher quality supplies that will last longer in an emergency situation.
Disaster preppers should store their kits in an easily accessible location. The kits should include supplies such as food, water, and shelter. A disaster prepper kit should also include: non-perishable food (minimum 3-day supply), water (4 litres per person per day), phone charger, power bank or inverter, battery-powered or hand-crank radio, battery-powered or hand crank flashlight.
It is important to have a copy of your emergency plan and important documents such as insurance papers and identification in your disaster prepper kit. It is also helpful to have cash in small bills, garbage bags and moist towelettes for personal sanitation, seasonal clothing, and sturd clothing. The disaster prepper kit should also include: footwear, a dust mask, a whistle, and an OK sign. The side of the sign should be displayed outward when in a window.
Step 2: Get a storage container
The best storage container for a disaster prepper kit is one of the following IRIS totes:
These bins are water-resistant and tough, making them perfect for storing outside. The bins have thick hand grips and stiff sides which make it resistant to bending and flexing. The storage container has a six-latch locking lid and is made of clear plastic. The two largest sizes are big enough to store all of your emergency gear, with room to spare.
A disaster prepper kit should include a storage container for food and water. The Aqua-Tainers from Amazon or the Augason Farms 55-gallon drum are both good options. Be sure to check the price before purchasing! The company sells a Disaster Prepper kit that includes a storage container for water. The kit includes a siphon hose, hand pump, and liquid water treatment made of chlorine dioxide. Chlorine dioxide is more effective than boiling water or using household bleach in an emergency setting when it comes to killing parasites like cryptosporidium and giardia.
The type of container you choose doesn’t really matter, as long as it’s cool and shaded. Storage containers for a disaster prepper kit should be sturdy and easy to move. Make sure the container is at least 480 pounds when full, to avoid being tipped over.
Step 3: Fill the container with the essentials
A disaster prepper kit should include food, water, and supplies for two weeks. It should be stored in a climate-controlled environment and in a sealed container to prevent spoilage. The kit should also include supplies for infants, elderly, or disabled family members.
Step 4: Store the container in a safe place
The best place to store your disaster prepper kit is in a water-resistant and tough storage bin like the Iris Clear Watertight Tote. The hand grips make it easy to carry, and the stiff sides refuse to flex even when the bin is full. The Disaster Prepper Kit comes in two sizes and can store a lot of emergency gear. The kit is tough enough to resist cracking if hit hard. Consider purchasing a second bin to store emergency meals.
A drum made of food-grade plastic is a good option for storing a two-week supply of water. The company sells an Emergency Water Storage Supply Kit which includes a siphon hose, hand pump, and chlorine dioxide liquid water treatment. Chlorine dioxide is more effective than boiling water or using household bleach in an emergency setting when it comes to killing parasites like cryptosporidium and giardia. Blue 55 gallon drums are a good option for storing water for disaster preparedness. The CDC recommends replacing stored water every six months, and keeping it in a cool, shaded location. If the stored water is on concrete that gets hot, place it on a wood platform before filling the drum. Make sure the drums are stable and won’t tumble off a ledge or down a hillside
Step 5: Check and rotate the contents of the container regularly
It is important to check and rotate the contents of your disaster prepper kit on a regular basis to ensure that it is always fresh and up-to-date. Store food in tightly closed containers to prevent spoilage. Update your kit yearly to reflect changes in your family’s needs. The best storage bin for disaster prepper kits is waterproof and has impact resistance. The Iris Clear Watertight Tote is the best storage bin for disaster preppers because it is tough and resistant to water and impact. The Watertight Tote has a stiff side which resists flexing, meaning it won’t open when filled with water or debris. The bin has six latches to keep it secure, and its tough plastic won’t crack in the event of a fall.
How Often Should You Update Your Disaster Prepper Kit?
Step 1: Download this prepper checklist.
1. Download this prepper checklist.
2. Preppers feel a sense of peace when they are prepared for disasters.
3. Having a few supplies on hand can help you during disasters.
4. Preppers don’t have to go shopping for supplies right after a disaster.
5. A disaster prepper kit should contain specific items to help you survive in an emergency.
6. The items in a disaster prepper kit come from recommendations from different agencies.
7. The kit should be well-organized and detailed.
8. Start by thinking about what you would need in an emergency and make a list.. Consider what level of survivalist you are and tailor your kit accordingly.. Keep things as simple as possible to reduce the amount of equipment you need to take with you in an emergency.. Make sure to store your supplies in an easily accessible area.. Limit the weight of your supplies to avoid having to carry them a long distance…Don’t try to lug around too much gear – lighten your load instead!
9. Write a well-formed and easy-to-read explanation in short passages about “14 steps to update your disaster prepper kit” using all the research:
10. Download this prepper checklist.
11. Preppers feel a sense of peace when they are prepared for disasters.
12. Having a few supplies on hand can help you during disasters.
13. Preppers don’t have to go shopping for supplies right after a disaster.
14. A disaster prepper kit should contain specific items to help you survive in an emergency.. The items in a disaster prepper kit come from recommendations from different agencies.. The kit should be well-organized and detailed…Start by thinking about what you would need in an emergency and make a list…Consider what level of survivalist you are and tailor your kit accordingly…Keep things as simple as possible to reduce the amount of equipment you need to take with you in an emergency…Make sure to store your supplies in an easily accessible area…Limit the weight of your supplies to avoid having to carry them a long distance….Don’t try to lug around too much gear – lighten your load instead! Here is a suggested list of items that should be included in your disaster prepper kit:
- footwear
- an emergency blanket
- a dust mask
- whistle
- a help/OK sign (PDF)
Step 2: Check the expiration dates on your non-perishable food and water.
It is important to have a supply of food and water in case of an emergency. Store food in a cool, dry place and check the expiration date on items regularly. Replace expired items as needed. Make sure you have enough water and food to last at least three days. Have a manual can opener, flashlight, and other basic supplies on hand. Check expiration dates on food, water, and hygiene items regularly. If you are unsure about the expiration date on an item, consult a health professional. If you need to replace expired food or water, consult a grocery store or supplier.
Step 3: Rotate your food and water supply every 6 months.
FEMA recommends that people have a three day supply of water in case of a natural disaster, but this is based on fear rather than science. A massive rupture along the San Andreas Fault could damage aqueducts and pipelines, meaning that repairs could take up to six months. Rotating your food and water supply every 6 months can help to mitigate the risks of floods and hurricanes.
It is a good idea to stockpile a 10-14 day supply of food and water in case of an earthquake. Rotating your food and water supply every 6 months to ensure you’re not eating expired food. Food and water stored in a freezer should be rotated every 6 months to ensure it is safe to eat.
Step 4: Check your first-aid kit and restock as needed.
It is important to have a first-aid kit readily available in your home in case of an emergency. A basic first-aid kit should include adhesive bandages, butterfly closures, tape, gauze pads, scissors, foil blankets, examination gloves, flashlight/glow sticks and instant cold pack. Additional items that can be included in a basic first-aid kit may include hot packs (for body temperature), aspirin or acetaminophen, allergy medication, Tweezer and burn cream. It is important to have a list of family medical history details as well as contact information for doctors and insurance companies readily available. Make sure to organize and store a first-aid kit in an accessible location.
A first-aid kit can help prevent small injuries from becoming infected and resulting in more serious medical complications. Include items such as iodine, gauze pads, medical tape, alcohol wipes, antibiotic ointment and aspirin in your first-aid kit. Remember to pack all medicines needed and include inhalers in your kit. Check the latest version of this Wikihow article for more tips on packing your first-aid kit.
You should check the supplies in your first-aid kit regularly and restock as needed so that it is always properly stocked and ready to use.
Step 5: Check your emergency supplies and restock as needed.
Your disaster prepper kit should be updated regularly in case of an emergency. You should check to see if anything needs to be restocked, such as food, water, or personal hygiene products. You should also bring extra batteries and chargers for your electronics in case of an emergency.
Step 6: Review your evacuation plan and update as needed.
It is important to review and update your evacuation plan regularly. This will ensure that you and your family are prepared in the event of an emergency. Reviewing your plan will also help you to identify any potential weaknesses or gaps in your preparations.
When reviewing your evacuation plan, make sure to have all the information you need to make informed decisions. Consider things like emergency routes, safe locations, and what supplies you will need. Tailor your plan to your specific community and situation.
Be sure to pack a hand-crank radio in case of an evacuation. To listen to AM emergency alerts, check the packaging for a “Public Alert” and “NOAA NWR All Hazards” label. To see if an emergency is happening in your area, check online or with local authorities. If you’re outside of the U.S., make sure to check the emergency frequency for your region.
Bring enough cell phones for everyone in your family, as well as extra chargers and batteries. Use cell phones sparingly during an emergency, only using them to communicate important information to family and friends. Purchase a solar-powered or hand crank charger to help keep your devices charged during an emergency. Bring a map in case your GPS or phone fails – Print out a road map and keep it in emergency storage.
Include items such as toothbrush, toothpaste, soap, and water in your kit. Make sure to store other items such as a first aid kit and flares. Store your kit where you will be able to find it easily in an emergency. Pack extra sets of clothes in case you can’t access your wardrobe for a long time.
Step 7: Practice your evacuation plan with your family.
It is important to have a plan and to practice it with your family. Having a plan will help you make better decisions in the event of an emergency.
Make sure your family knows how to evacuate and where to go. Store important documents, photos, and other items together in one place. Keep passports and other important documents close to your person at all times.
Make sure to pack a hand-crank radio in case of an emergency. You should check the “Public Alert” and “NOAA NWR All Hazards” label on the packaging of your radio to ensure you are receiving alerts. Emergency frequency information is available online. Even if you run out of batteries, you will be able to receive alerts with a hand-crank radio.
Bring extra cell phone chargers in case the power goes out. Bring cell phones so you can stay in touch with family and friends during an evacuation or emergency. Bring extra batteries and chargers for cell phones as well as a solar-powered or hand crank charger so devices can stay charged during an emergency situation. Use cell phones sparingly when not connected to power so they last longer.
It is also important to have a road map in case of an emergency; print one out online or purchase from a gas station. Lastly, make a survival kit for your family that includes items such as food, water, first aid supplies, and shelter. Make sure everyone knows the evacuation plan and how to use the kit. Practice your evacuation plan with your family so you’re both comfortable with the process; familiarize yourself with your community’s evacuation procedures as well.